240 gallon Tank Renovation
-
- Posts: 176
- Joined: 04 Mar 2011, 02:19
- I've donated: $57.00!
- My cats species list: 1 (i:1, k:0)
- My aquaria list: 2 (i:1)
- Location 2: Florida, USA
240 gallon Tank Renovation
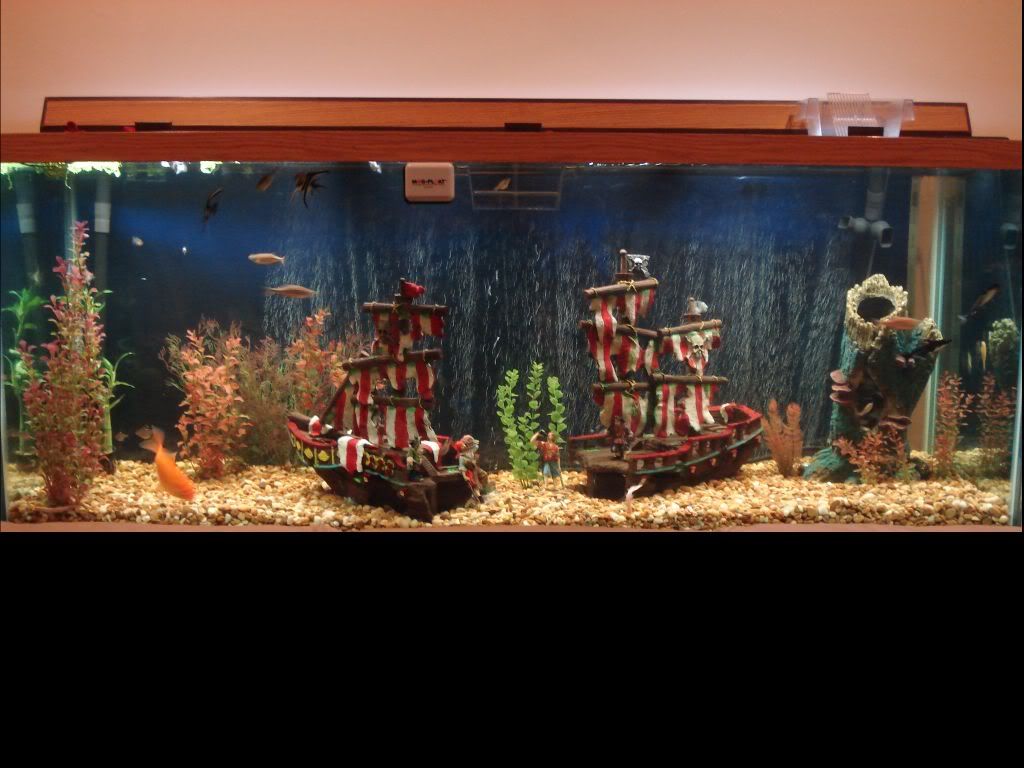
I decided to renovate my 240 gallon tank and switch from a "pirate" theme to a more natural look. This is what I had previous to starting the renovation.
After a lot of searching for driftwood I decided to make do with what is available at a reasonable price. I bought a few smaller pieces and rigged them together to make what I believe is the start of a nice display.
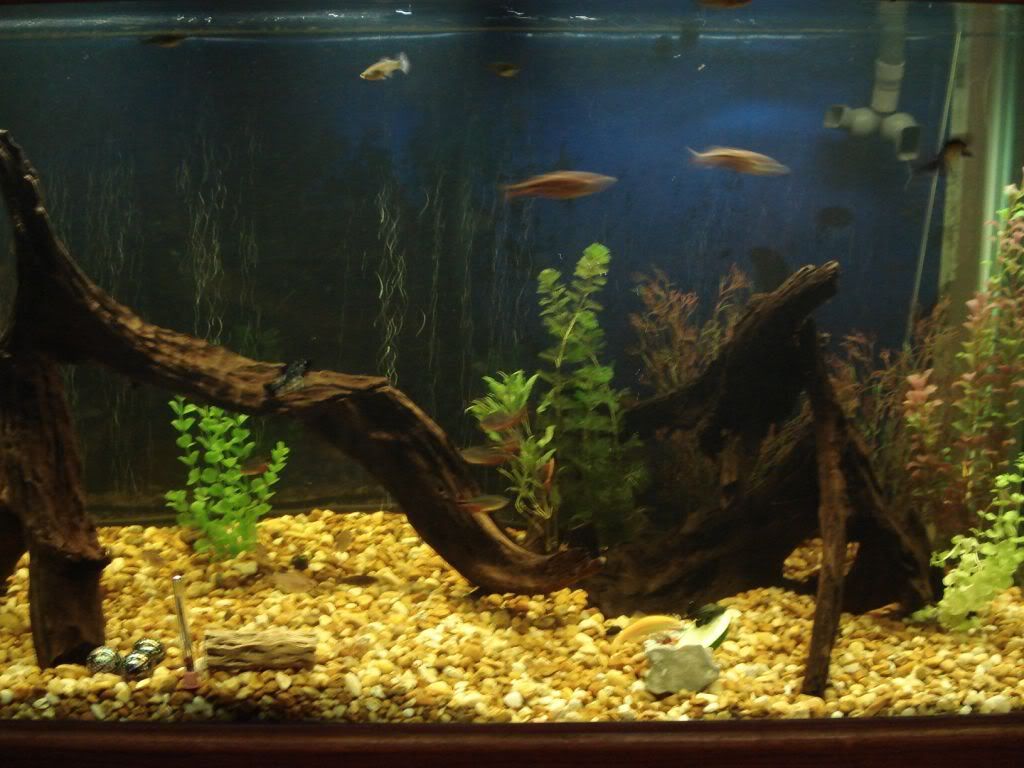
Starting from the left side of the photo at the bottom is an inverted Y shaped piece that I drilled on one end using a 1.5 inch bit so that a second piece could be cradled ontop. Ontop of the first piece is another short piece that branches to the left and is spliced to a third piece making one long branch.
From there I piled 3 pieces together to make the right side and currently have a single piece on the far left side.
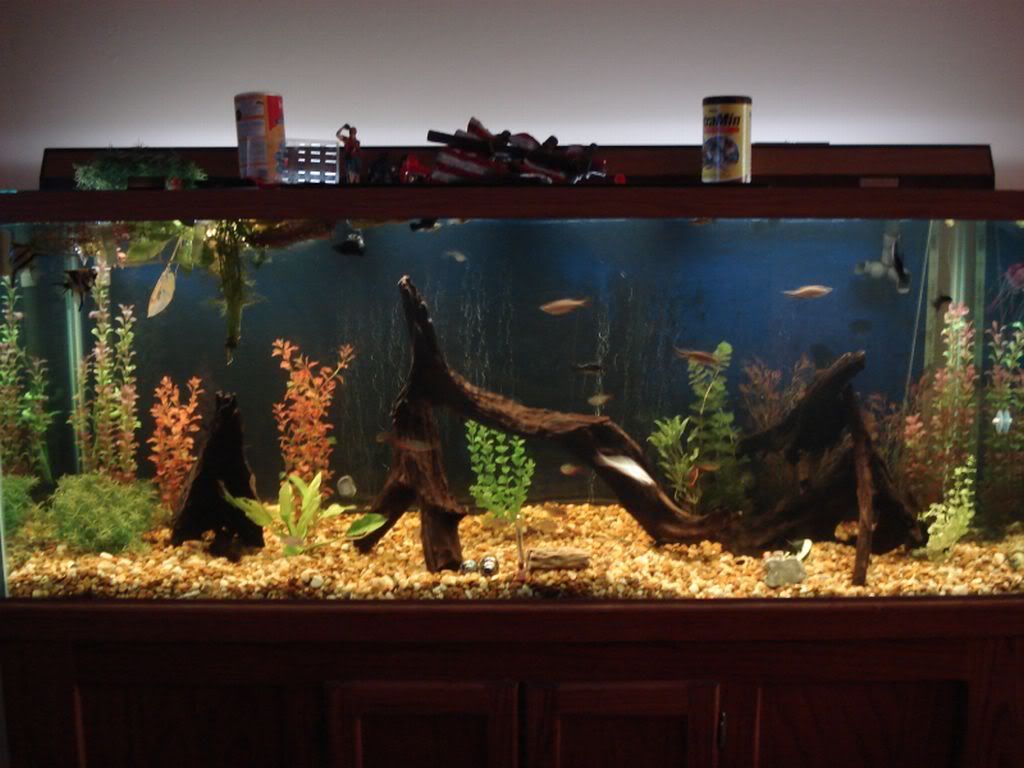
The driftwood is starting to release some tannins and the water is getting a nice light tea coloring. This is a work in progress and my next step is to add some more live plants. I'm also proud to say there are only 2 screws needed to hold the entire center piece together.
You may notice a bunch of plants floating at the top left. They surround my fry tank which currently has half a dozen mollies in it and also provide a hiding place for my african butterfly.

- Matt30
- Posts: 252
- Joined: 20 Nov 2010, 00:47
- I've donated: $50.00!
- My cats species list: 9 (i:9, k:0)
- My aquaria list: 1 (i:1)
- My BLogs: 3 (i:8, p:100)
- Location 2: England. Surrey ,Caterham
Re: 240 gallon Tank Renovation
Hi mate 100% better
"Justice is coming to all of us no matter what we do"-WATCHMEN
- MatsP
- Posts: 21038
- Joined: 06 Oct 2004, 13:58
- My articles: 4
- My images: 28
- My cats species list: 117 (i:33, k:0)
- My aquaria list: 10 (i:8)
- My BLogs: 4 (i:0, p:97)
- Spotted: 187
- Location 1: North of Cambridge
- Location 2: England.
Re: 240 gallon Tank Renovation
Definitely much better, for sure.
--
Mats
--
Mats
-
- Posts: 176
- Joined: 04 Mar 2011, 02:19
- I've donated: $57.00!
- My cats species list: 1 (i:1, k:0)
- My aquaria list: 2 (i:1)
- Location 2: Florida, USA
Re: 240 gallon Tank Renovation
First I want to credit forum member DAN* for this idea which I got after seeing how he created his pleco caves.
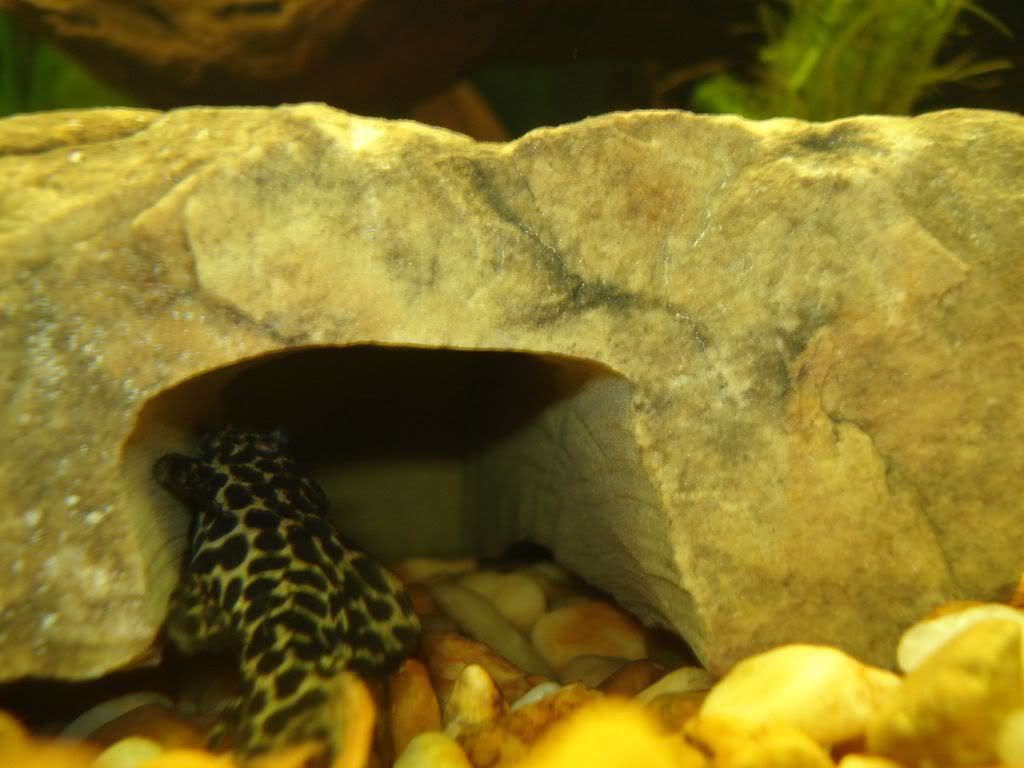
Before making my final design of the cave I just cut a groove in a rock and placed it in my tank last night to see what might happen. This is what I found this morning (one of my L114 made a new home)
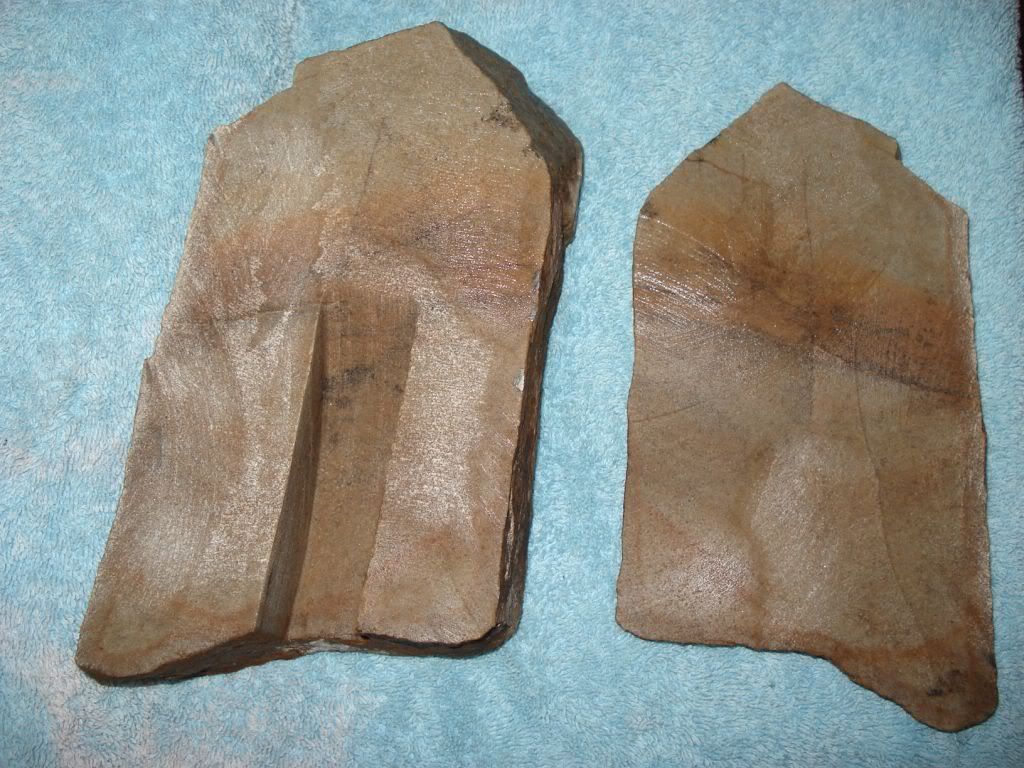
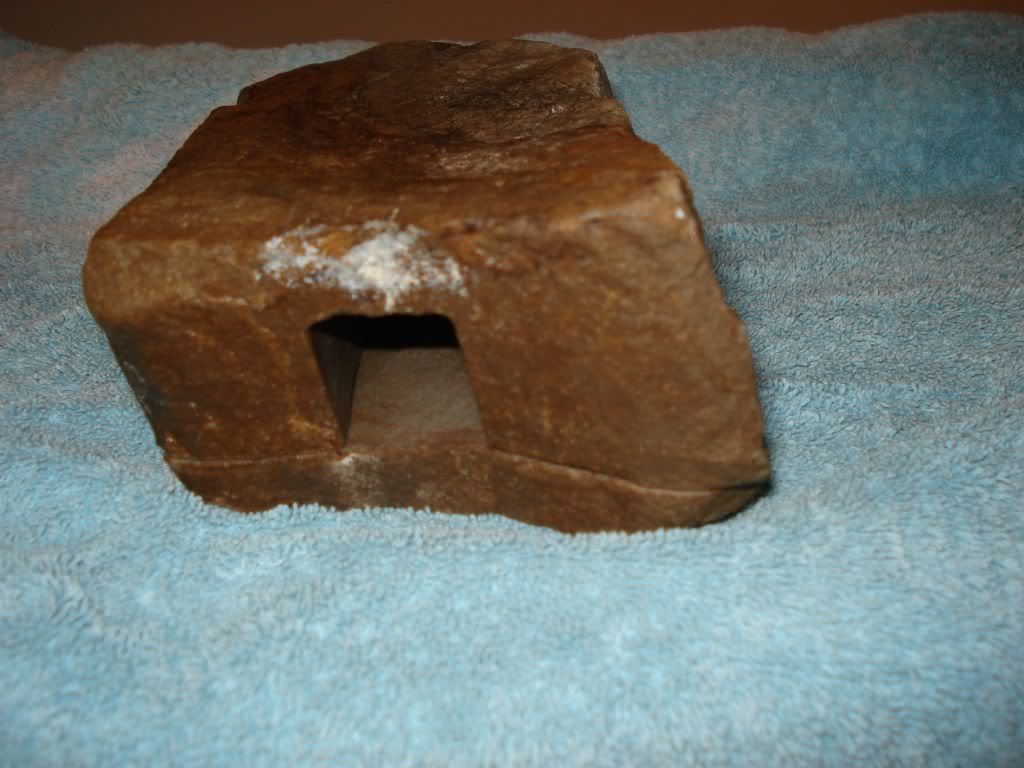
This is what I came up with as a final effort. My plan is to either silicone or use wood pins to hold the the two pieces together. I'm leaning toward the pins (one drilled into each side just to keep the pieces from sliding) this way if my fish breed and I have to remove the eggs for any reason I could simply unhalf the rock and transfer the eggs.
The stone is Texas Fieldstone which from what I can tell is a type of sand stone. The one I put in my tank yesterday bubbled for about 30 minutes.
-
- Posts: 176
- Joined: 04 Mar 2011, 02:19
- I've donated: $57.00!
- My cats species list: 1 (i:1, k:0)
- My aquaria list: 2 (i:1)
- Location 2: Florida, USA
Re: 240 gallon Tank Renovation
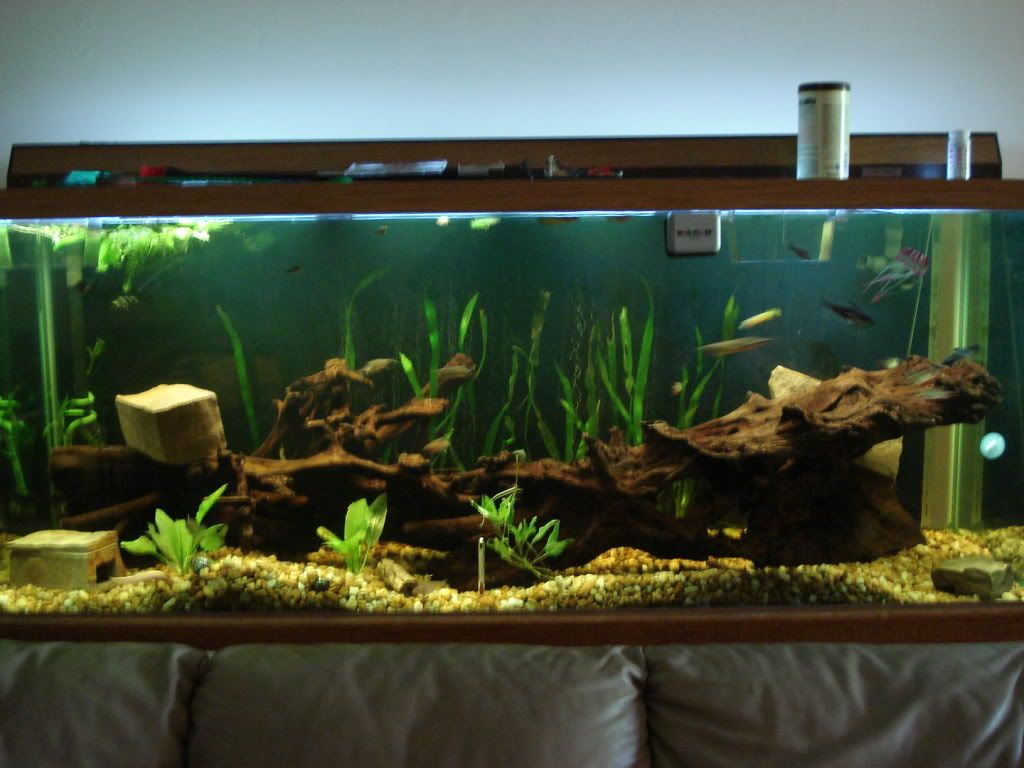
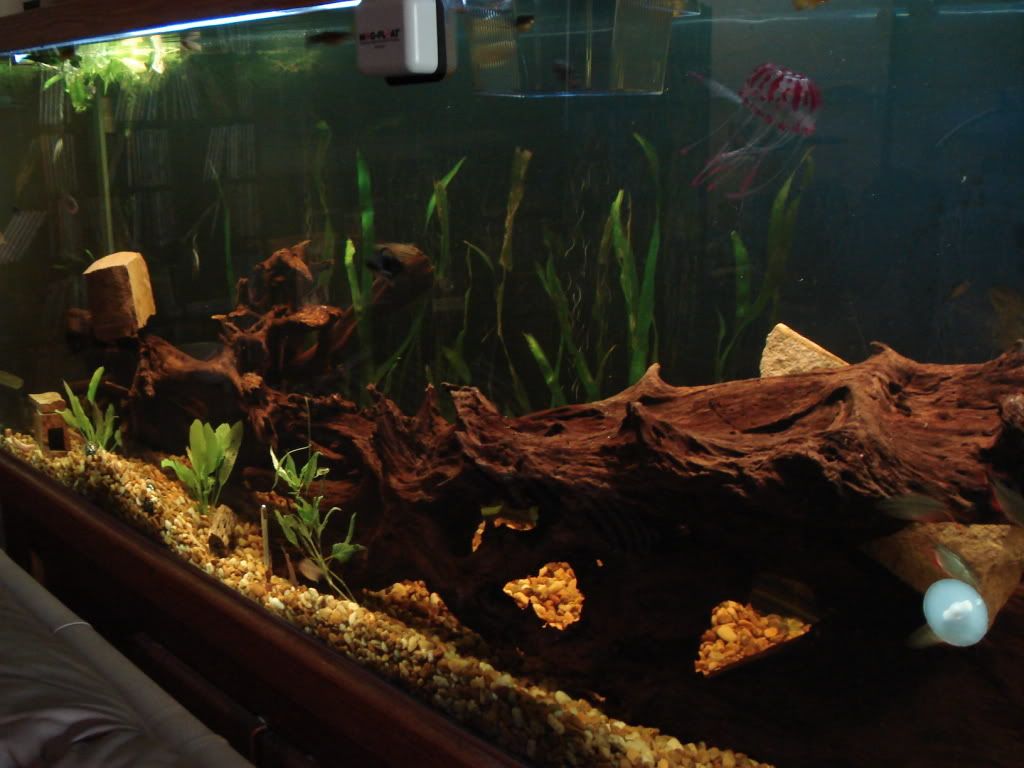
Just about the time I got all the small pieces of driftwood where I liked them my LFS came through with two huge pieces of driftwood each about a meter long. I soaked each one for a week in a large tub but couldn't wait any longer so I put them in the tank with a couple rocks to hold them in place for another week until they will stay down.
So here are the new pics of the tank on round two of going natural.
This is a large tank but I just can't get it to look big in the pics so I tried this agle shot.
As you may notice there is a jellyfish in the tank. That was one of those things the kids see in the store and have to "get it for daddy". It's as fake as they come but the kids get a kick out of it, funny how neither of them wanted it in the tanks in thier bedrooms. The plants are kind of ragged looking because I found out the hard way that my snails love to chew plants. They have been moved to other tanks and one went into the outdoor pond. I also changed out the lighting to ultrasun bulbs so the plants should get enough light in the dark water.
-
- Posts: 5
- Joined: 11 Apr 2010, 10:15
- My cats species list: 12 (i:0, k:0)
- Location 2: canada
Re: 240 gallon Tank Renovation
very nice waaaay better looking then the pirate theme
- bigbird
- Posts: 231
- Joined: 03 Nov 2010, 09:08
- My cats species list: 4 (i:0, k:0)
- Location 1: Sydney, Australia
- Location 2: Sydney, Australia
- Interests: Ls, Fish, Aquatics, Viszlas and Family
Re: 240 gallon Tank Renovation
much better indeed. good one cheers jk
I am not perfect, but I say as I see it. Smile and enjoy Life